Samsung J7 Nxt (J701) Touch Not Working? Repair File & Flashing Guide
Samsung Galaxy J7 Nxt (J701) Touchscreen Problem After Update or Repair?
Many users of the Samsung Galaxy J7 Nxt (models like SM-J701F, SM-J701M, SM-J701G) encounter an frustrating issue where the touchscreen stops working or becomes unresponsive. This often happens after:
- Replacing the phone's screen (using an aftermarket or incompatible display).
- Updating the phone's official software (firmware).
This problem usually occurs because the firmware (specifically components controlling the touchscreen driver, often within the kernel or bootloader) becomes incompatible with the new hardware (screen) or a specific software combination.
What is the J7 Nxt Touch Repair File?
The "J7 Nxt Touch Repair File" discussed here is typically a modified firmware component, usually distributed as a .tar or .tar.md5 file, designed to be flashed using the Samsung Odin tool. It's not a full stock firmware package.
Instead, it usually contains specific, altered parts (like a modified bootloader (BL) or kernel within the AP file) that aim to restore touchscreen functionality by introducing compatible touch drivers or reverting specific checks that cause the incompatibility. These files are often created by third-party developers or repair communities.
Important: These are specialized files targeting a specific problem. Flashing them is generally considered an unofficial repair method.

Crucial Prerequisites Before Flashing!
- Verify Device Model:** Ensure your device is indeed a Samsung Galaxy J7 Nxt (SM-J701F, J701M, J701G, etc.). This file is specific to this model range.
- Install Samsung USB Drivers:** Your PC must have the latest Samsung USB drivers installed.
- Download the Correct Touch Repair File:** Download the specific J7 Nxt touch repair file offered on this page (or from another trusted source). Ensure it matches any specific version requirements if mentioned (e.g., compatible with a certain Android version or binary).
- Backup Your Data:** While this file might only target specific partitions, any flashing process carries a risk. It's always wise to back up important data if the phone is somewhat usable or if you plan to flash full firmware later.
- Charge Your Device:** Battery level should be above 50%.
- Windows PC & Odin Tool:** You need a Windows computer and a reliable version of the Samsung Odin tool extracted and ready.
- Quality USB Cable:** Use the original or a good quality data cable.
- Disable Antivirus Temporarily (Optional but sometimes needed): Some repair files might be flagged by antivirus software. Use caution if you disable it.
⚠️ IMPORTANT WARNINGS!
- Risk of Bricking:** Flashing modified or incorrect files can brick your device. Ensure the file is specifically for your J7 Nxt model and potentially firmware version.
- Unofficial Method:** This is not an official Samsung solution. Use at your own risk.
- May Not Work:** The success of these files can depend on the exact cause of the touch issue, the quality of the replacement screen, and the specific software version on your phone. It's not guaranteed to fix every touch problem.
- Potential Side Effects:** Flashing modified files might occasionally introduce other minor bugs or affect future official updates.
- Warranty Void:** Using Odin and flashing unofficial files will likely void your warranty.
- Responsibility:** You are solely responsible for the outcome. We (firmware.repairtofix.com) are not liable for any damage.
How To Flash the J7 Nxt Touch Repair File Using Odin
Follow these steps carefully:
- Install Drivers & Extract Files:** Ensure Samsung drivers are installed. Extract both the downloaded Odin tool and the J7 Nxt Touch Repair file (
.taror.tar.md5) to separate folders. - Enter Download Mode:**
- Power off your J7 Nxt completely.
- Press and hold Volume Down + Home Button + Power Button simultaneously.
- When the warning screen appears, press Volume Up to enter Download Mode.
- Launch Odin: Open the extracted Odin folder and run the
Odin3.exeapplication as administrator. - Connect Device: Connect the J7 Nxt (in Download Mode) to your PC using the USB cable. Odin should show an "Added!!" message and a blue COM port box. If not, check drivers and connection.
- Load the Touch Repair File:
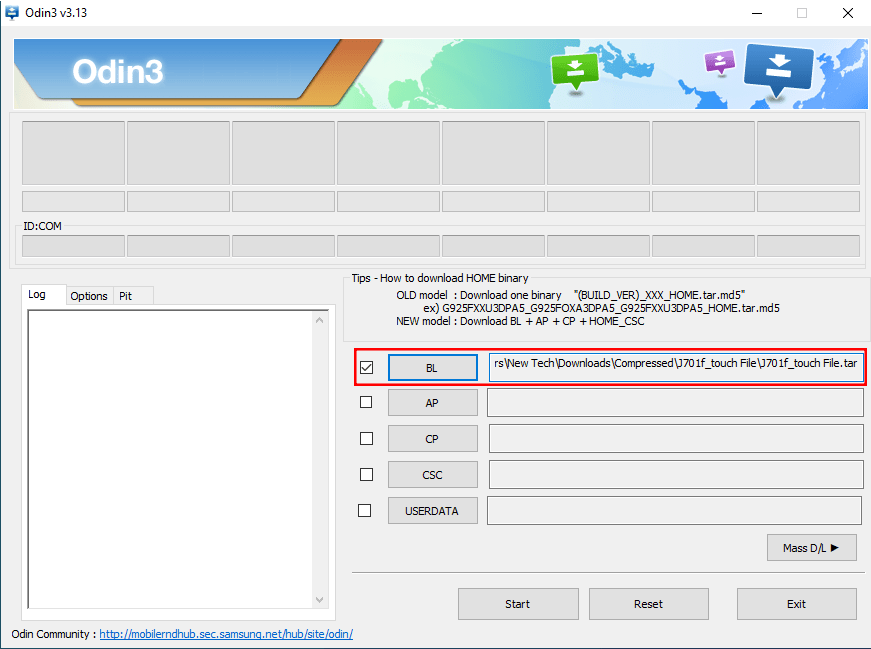
- Crucial Step: Determine which Odin slot to use. Most J7 Nxt touch repair files are designed to be flashed in either the BL (Bootloader) slot OR the AP (Application Processor/System) slot. Check any instructions provided with the file download.
- If the file modifies the bootloader, click the BL button in Odin and select the downloaded
.taror.tar.md5touch repair file. - If the file modifies the kernel/system (more common for touch drivers), click the AP button in Odin and select the downloaded touch repair file.
- Do NOT load files into other slots (CP, CSC) unless specifically instructed by the file provider. Leave them empty.
- Check Odin Options:** Go to the "Options" tab. Ensure only "Auto Reboot" and "F. Reset Time" are checked. Make absolutely sure "Re-Partition" is UNCHECKED.
- Start Flashing:** Click the "Start" button in Odin.
- Monitor Progress:** Watch the progress bar in Odin. This flash should be relatively quick compared to full firmware.
- PASS! Message:** Wait for the green "PASS!" message to appear in Odin.
- Reboot and Test:** The phone should reboot automatically. Once it starts up, disconnect the USB cable and immediately test the touchscreen responsiveness.
What If It Doesn't Work?
- Recheck File & Slot:** Ensure you used the correct file for your J7 Nxt model and loaded it into the appropriate Odin slot (BL or AP).
- Try Different File Version:** Sometimes different versions of repair files exist for different firmware basebands.
- Flash Full Stock Firmware:** If the touch repair file fails, the next step is often to flash the latest *full* official stock firmware for your device model and region using Odin (loading all BL, AP, CP, and CSC files). This ensures all software components are consistent, but it *may* reintroduce the touch issue if the problem lies solely with screen compatibility.
- Hardware Issue:** The problem could be a faulty replacement screen, a damaged connector on the motherboard, or other hardware damage.
Conclusion
The J7 Nxt touch repair file, flashed via Odin, can be a potential solution for unresponsive touchscreens on the SM-J701 models, especially after screen replacements or updates. However, it's an unofficial method requiring careful execution. Always verify your model, use the correct Odin slot (usually BL or AP for these files), understand the risks, and be prepared to flash full stock firmware if it doesn't resolve the issue. Backup your data if possible before attempting any flash.
Download Files
Please subscribe to our channel to access files
Related Posts
QPST (Qualcomm Product Support Tools): The Ultimate Guide & Flashing Tutorial
Discover QPST, Qualcomm's suite of tools for servicing Snapdragon devices. Learn about its components like QFIL, how to install and use it for flashing firmware, diagnostics, and EFS/QCN management. Includes critical warnings.
SPD Flash Tool (Spreadtrum): The Complete Guide to Flashing PAC Firmware
Learn how to use SPD Flash Tool (Spreadtrum/UNISOC Upgrade Tool) to flash .pac firmware files on Android devices. Download the tool, install drivers, and follow our step-by-step guide. Includes vital prerequisites and warnings.
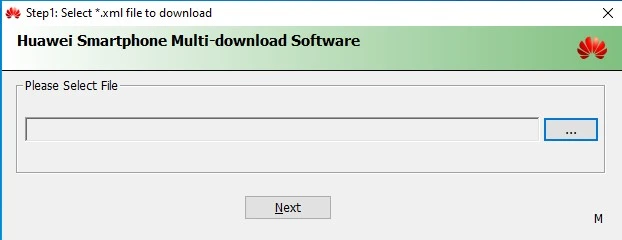
Huawei Smartphone Multi-Download Tool: Guide to Flashing XML Firmware
Learn about the Huawei Smartphone Multi-Download Tool for flashing stock firmware (often XML-based) on Huawei smartphones and tablets. Understand its usage, prerequisites like Huawei drivers, and the general flashing process.
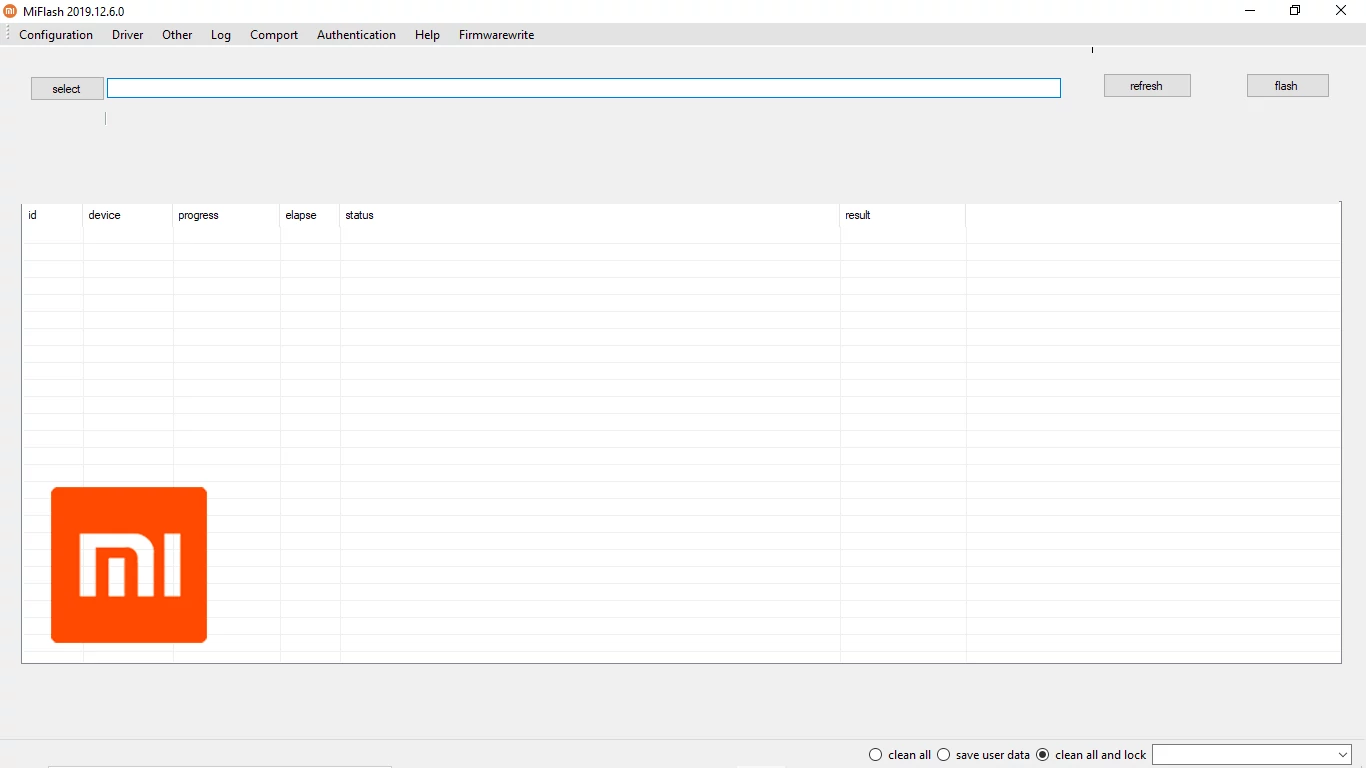
Xiaomi Mi Flash Tool: The Official Guide to Flashing Fastboot ROMs
Learn how to use the official Xiaomi Mi Flash Tool to flash Fastboot ROMs (.tgz packages) on Xiaomi, Redmi, and POCO devices. Understand Fastboot mode, built-in drivers, flashing options (clean all, save user data, clean all and lock), and bootloader unlock prerequisites.
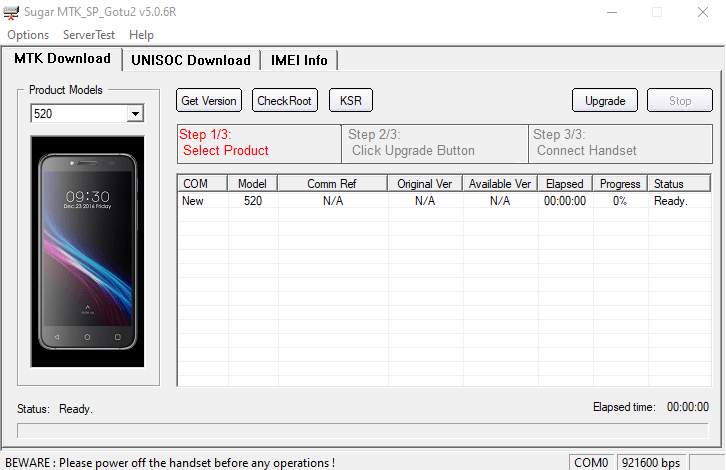
Sugar MTK SP Tool: A Guide to Flashing MediaTek Devices
Explore the Sugar MTK SP Tool, a Windows application for flashing stock firmware on Android devices with MediaTek (MTK) chipsets. Learn about its potential uses, prerequisites like MTK VCOM drivers, and general flashing steps.

Samsung Kies: PC Suite for Older Samsung Devices (Download & Info)
Learn about Samsung Kies, the legacy PC suite software for older Samsung mobile phones and tablets. Understand its functions like data synchronization, backups, and firmware updates. Information on different Kies versions and the current alternative, Smart Switch.