how-to-install-mtk-usb-driver
Why MTK VCOM/Preloader Drivers Are Essential for SP Flash Tool
When you need to flash firmware onto an Android device powered by a MediaTek (MTK) chipset using tools like SP Flash Tool, your Windows computer must be able to correctly recognize the device in its special "Preloader" mode. This mode is active when the device is powered off (or in a specific boot state) and connected to the PC, allowing low-level access for firmware flashing.
The MTK Preloader USB VCOM drivers (often referred to simply as MTK VCOM drivers) are specifically designed to facilitate this communication. Without these drivers properly installed, SP Flash Tool will not detect your MTK device, and you won't be able to initiate the flashing process. This article guides you on how to install these crucial drivers.

Critical First Step: Disable Driver Signature Enforcement (Windows 8/10/11)
Before attempting to install unsigned MTK VCOM/Preloader drivers (which many are), you will likely need to temporarily disable Driver Signature Enforcement in Windows. This is the most common reason for installation failure on modern Windows versions.
- Save all your work and close open applications.
- Go to Windows Settings > Update & Security > Recovery.
- Under the "Advanced startup" section, click "Restart now."
- Your PC will restart and show a blue options screen. Choose Troubleshoot > Advanced options > Startup Settings > Restart.
- After another restart, you'll see a list of startup options. Press the number key (usually 7 or F7) corresponding to "Disable driver signature enforcement."
- Windows will now boot with driver signature enforcement disabled for the current session, allowing you to install the MTK drivers.
(For a detailed guide with images on disabling driver signature enforcement, you can refer to our separate tutorial here.)
Method 1: Installing MTK Drivers Using an Auto-Installer Package
Many MTK driver packages come as "auto-installers" that simplify the process.
Steps for Auto-Installation:
- Download the MTK Driver Auto-Installer:**
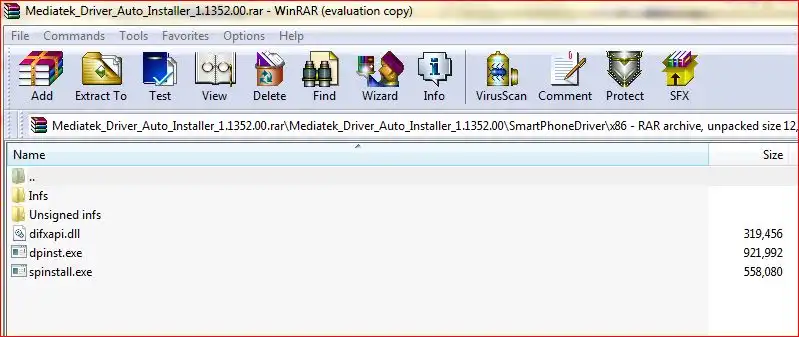
Obtain a reliable MTK VCOM/Preloader driver auto-installer package. The original post linked to a package named "Mtk driver RepairMyMobile.in.zip". (Users should always verify the source of driver downloads for safety and authenticity.)
Recommendation: Seek MTK drivers from reputable Android developer communities like XDA Developers, or from guides accompanying the SP Flash Tool version you are using, as they often link to compatible driver sets. Ensure the package explicitly mentions VCOM/Preloader support.
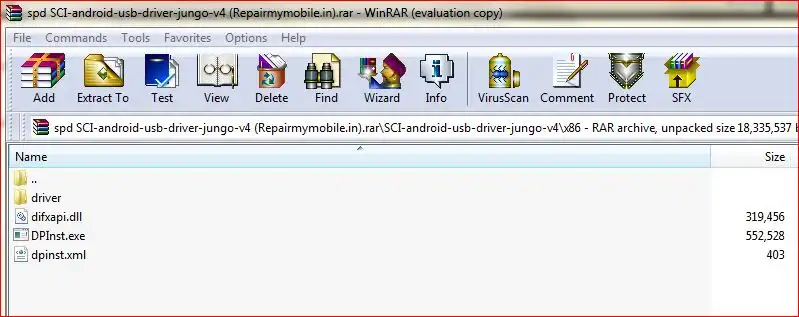
- Extract the Archive:** If the downloaded file is a
.zipor.rar, extract its contents to a folder on your computer using WinRAR, 7-Zip, or similar. - Run the Setup Executable:**
- Locate the installer file (e.g.,
Install.bat,Setup.exe,DriverInstaller.exe, or a specifically named MTK driver installer). - Right-click on the setup file and select "Run as administrator."
- Locate the installer file (e.g.,
- Follow On-Screen Prompts:** The installer will typically guide you. This might involve:
- Accepting license agreements.
- Clicking "Next" or "Install" buttons.
- You will likely see Windows Security pop-ups asking to "Install this driver software anyway" for various MediaTek driver components (like "MediaTek DA USB VCOM Port," "MediaTek PreLoader USB VCOM Port"). Choose to Install for each one.
- Reboot Your PC (Highly Recommended):** After the installation is complete, restart your computer. This is crucial for the drivers to be fully loaded and recognized, especially after disabling driver signature enforcement.
Method 2: Manually Installing/Updating MTK VCOM/Preloader Drivers via Device Manager
If an auto-installer doesn't work perfectly, or if you only have the raw driver files (.inf, .sys, .cat), you can install or update them manually. This is also useful if Windows detects the device but assigns a generic or incorrect driver initially.
The original post's steps from 5-10 seemed to hint at this manual update process after an initial connection. Here's a more structured approach:
Steps for Manual Installation:
- Ensure Driver Signature Enforcement is Disabled (as described above, if using Windows 8/10/11).
- Download and Extract Manual Driver Files:** Obtain a package of MTK VCOM/Preloader driver files (not an auto-installer, but the actual
.inf, etc., files) and extract them to a known location. - Connect Your Powered-Off MTK Device:** Power off your MediaTek device completely. Then, connect it to your PC via USB.
- For a brief moment, Windows should attempt to detect it. If drivers are missing or incorrect, it might appear in Device Manager under "Other devices" as "Unknown device" or with a specific MTK Preloader name but a yellow exclamation mark.
- If it doesn't appear, you might need to press and hold a boot key (Volume Up or Volume Down) on the device *just before* or *as* you connect the USB cable to force it into Preloader mode.
- Open Device Manager:** Right-click the Start button and select "Device Manager."
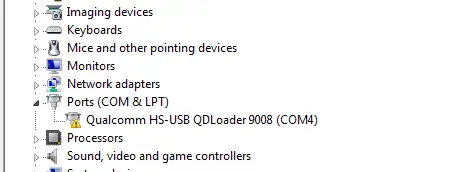
- Locate the Device:** Find your MTK device. It will likely be under "Other devices" (if drivers are completely missing) or "Ports (COM & LPT)" (if partially recognized, e.g., as "MediaTek USB Port" with an error, or even "MT65xx Preloader").
- Update Driver:** Right-click on the MTK device entry and select "Update driver" (or "Update Driver Software...").
- Select "Browse my computer for drivers."
- Select "Let me pick from a list of available drivers on my computer."
- If you see a list of device types, select "Show All Devices" and click Next, or look for "Ports (COM & LPT)". Then click "Have Disk...".
- In the "Install From Disk" dialog, click "Browse...".
- Navigate to the folder where you extracted the manual MTK VCOM/Preloader driver files. Find the appropriate
.inffile (e.g.,usb2ser_Win7.inf,usbvcom.inf, or one specific to your Windows version and architecture - 32/64 bit). Select it and click "Open," then "OK." - You should now see a list of drivers. Select the appropriate one, usually named something like "MediaTek PreLoader USB VCOM Port" or "MediaTek DA USB VCOM Port". Click "Next."
- If a Windows Security warning appears ("Windows can't verify the publisher..."), choose "Install this driver software anyway."
- Wait for the installation to complete. You should see a success message.
- Reboot Your PC:** It's good practice to reboot after manual driver installation as well.
Verifying MTK VCOM/Preloader Driver Installation
After installation and rebooting:
- Open Device Manager.
- Power off your MTK device completely.
- Connect it to the PC via USB (you might need to hold a boot key like Volume Down or Up on some devices just as you plug it in to trigger Preloader mode for detection by SP Flash Tool).
- Observe Device Manager. Under "Ports (COM & LPT)," you should briefly see an entry like "MediaTek PreLoader USB VCOM (Android) (COMxx)" or "MediaTek USB Port (COMxx)" appear for a few seconds and then disappear. This indicates the Preloader driver is working correctly and ready for SP Flash Tool. If SP Flash Tool is open and configured, it should then detect this port.
If the port shows with a yellow exclamation mark, or if it doesn't appear at all, there's likely still an issue with driver signature enforcement or the driver installation itself.
Where to Find Reliable MTK Driver Installers
As emphasized, sourcing drivers from trusted locations is key. While the original post provided a direct download link, it's generally safer to:
- Search reputable Android developer forums like XDA Developers for "MTK VCOM Preloader drivers auto installer" or "MTK USB All drivers." Community members often share reliable packages and provide support.
- Refer to official guides for SP Flash Tool, as they frequently recommend or link to compatible driver sets.
- Some tech blogs specializing in MTK devices compile and verify driver packages.
Due to the critical nature of these drivers and the importance of using verified sources, this article advises users to carefully vet any download location. Direct links to third-party hosted files are not re-linked here to encourage safer practices.
Conclusion
Installing the correct MTK Preloader USB VCOM drivers is the foundational step for successfully flashing MediaTek Android devices with SP Flash Tool. Whether using an auto-installer or performing a manual setup, addressing Windows Driver Signature Enforcement on modern systems is often necessary. Proper driver installation ensures that SP Flash Tool can reliably detect and communicate with your device in its crucial Preloader mode.
Related Posts
Qualcomm HS-USB QDLoader 9008 Driver: Install Guide (Auto & Manual)
Learn how to install Qualcomm HS-USB QDLoader 9008 drivers on Windows (32/64-bit) for EDL mode flashing. Step-by-step guide for both auto-installer and manual installation methods, including solving driver signature issues.
Minimal ADB and Fastboot: Easy Driver & Tool Auto-Installer
Easily install ADB (Android Debug Bridge) and Fastboot drivers and tools on your Windows PC using the Minimal ADB and Fastboot auto-installer. Essential for Android debugging, bootloader unlocking, and flashing devices in Fastboot mode.

MTK CDC Drivers for Android: Auto Installer & Guide
Learn about MediaTek (MTK) CDC drivers for Android devices, crucial for proper ADB, modem, and diagnostic connections. Understand their purpose and how to install them using an auto-installer package.

Micromax USB Drivers: Installation Guide for PC Connectivity
Learn why Micromax USB drivers are essential for connecting your phone to a PC for file transfer, firmware flashing, and ADB/Fastboot operations. General installation guide and tips for finding drivers for older Micromax models.
iPhone Not Connecting to PC/Mac? Fix USB & Driver Problems - 2025 Guide
Is your Windows PC or Mac not recognizing your iPhone? This 2025 guide helps you troubleshoot common USB connection problems, iTunes/Finder detection issues, and potential Apple Mobile Device Support driver errors for seamless connectivity.
SPD (Spreadtrum/UNISOC) USB Driver: Auto-Installer Guide (DPInst)
Learn how to install SPD (Spreadtrum/UNISOC) USB drivers on Windows using an auto-installer (DPInst.exe). Essential for flashing firmware with SPD Upgrade Tool/ResearchDownload. Includes troubleshooting for driver signature issues.